Finally, the weather co-operates

_DSC0004 IMG_0218_DSC0002 _DSC0003
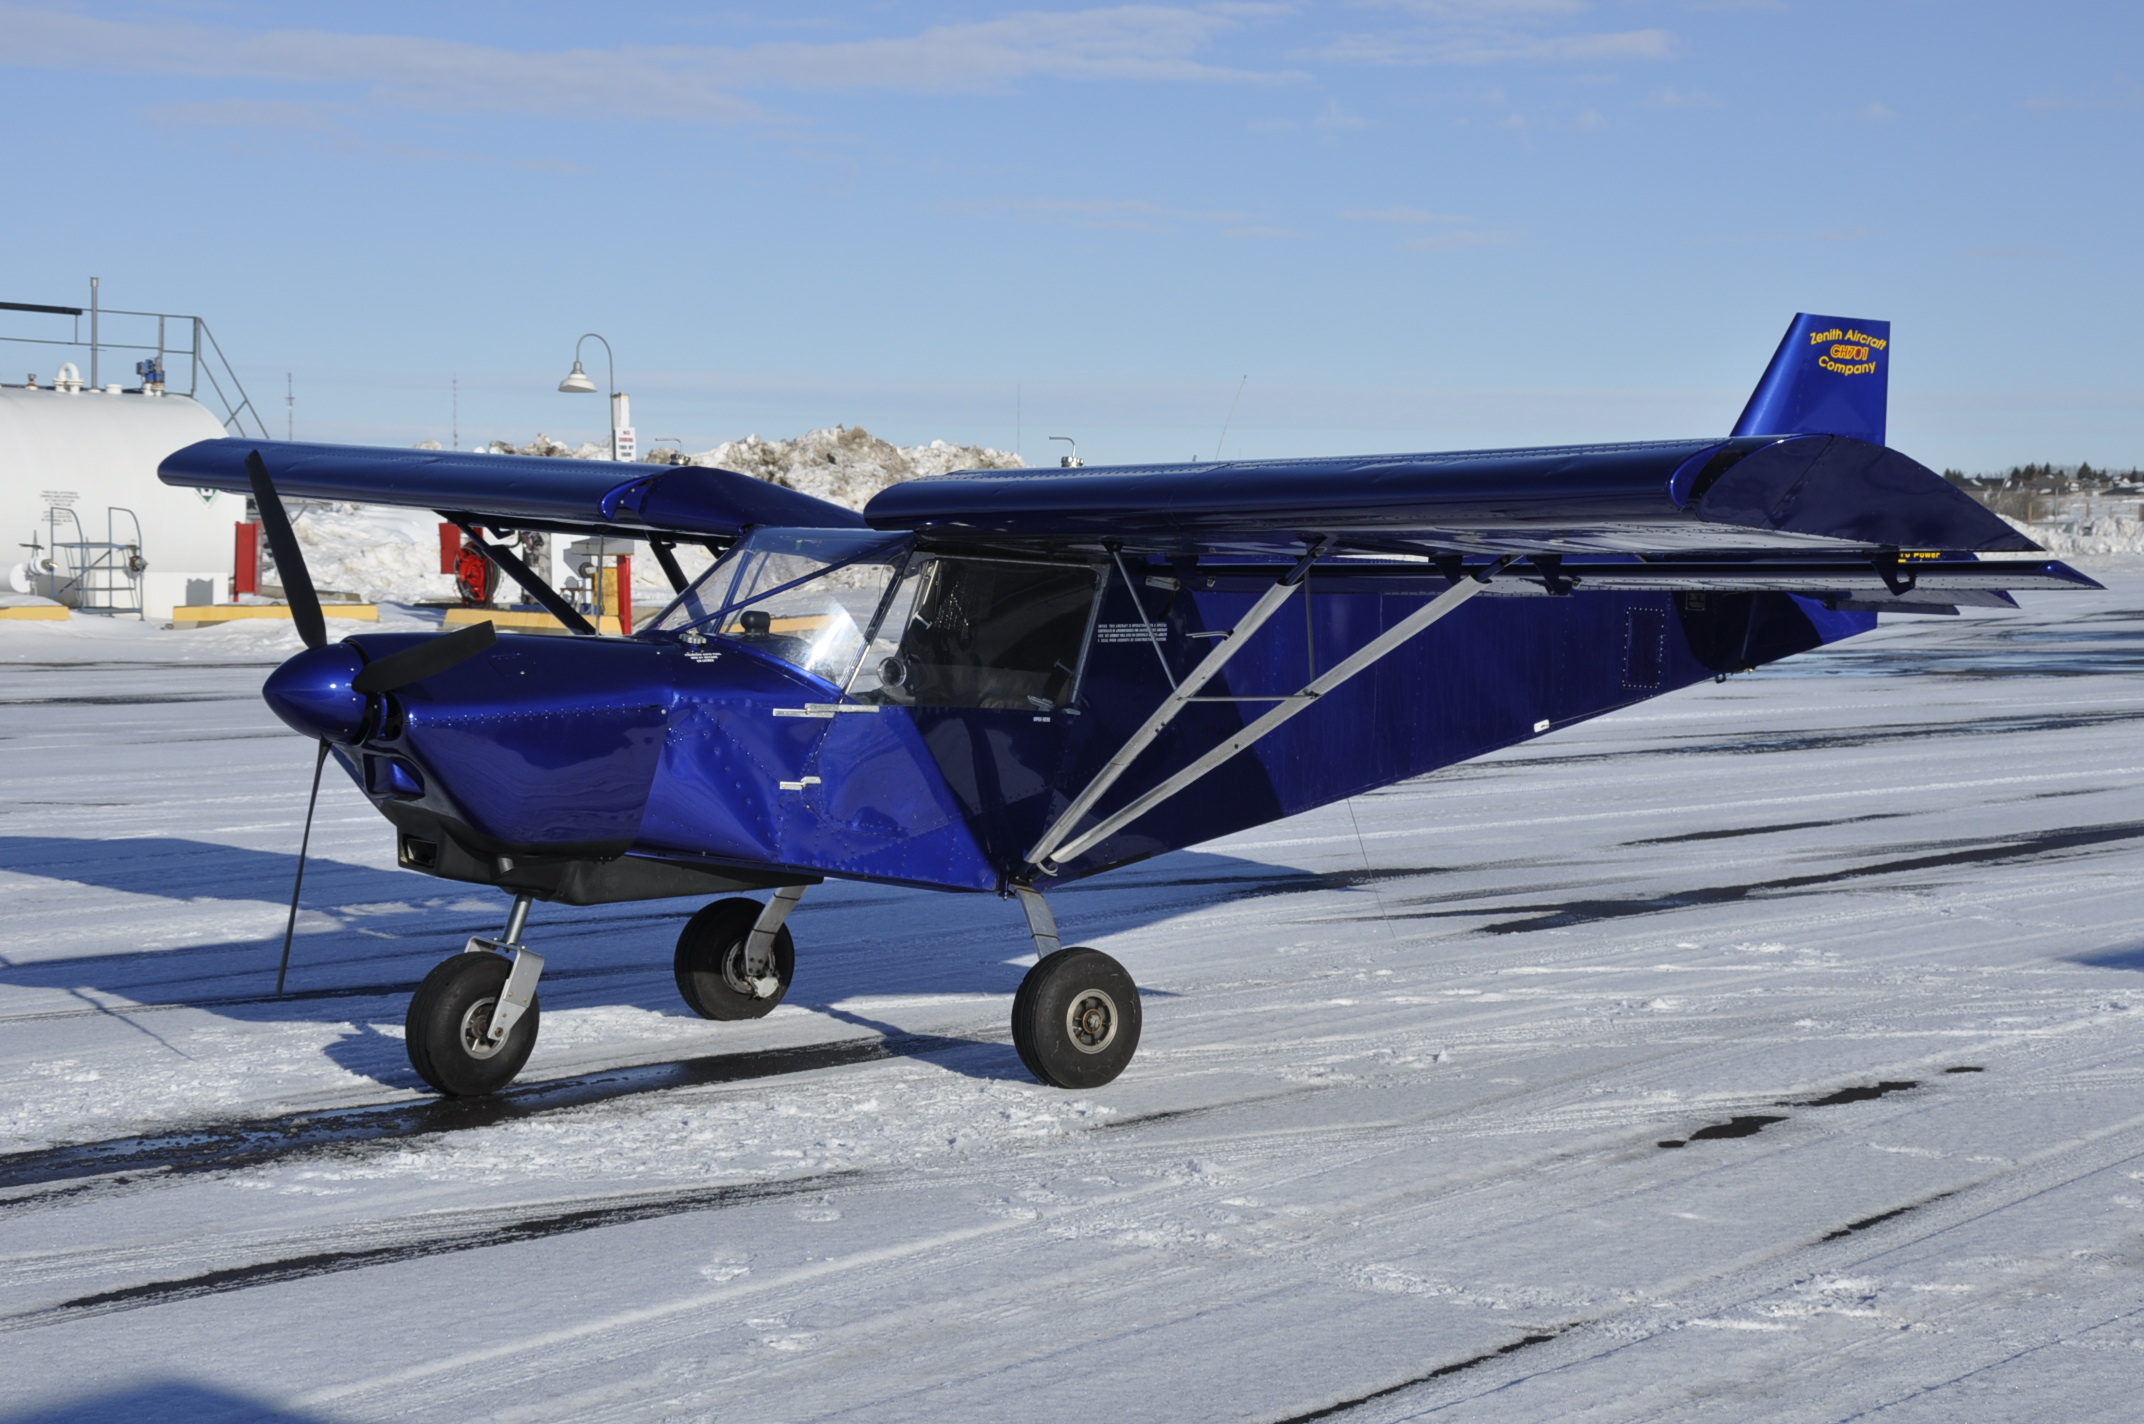
I have been waiting for the winter to relax and give us some warm calm weather. Finally temperatures on the plus side on a weekend. I dropped the pitch on the prop by one more degree to 13.5 degrees. This pitch allows the engine to hit 5000 rpm static rpm during the takeoff roll and climb out. 5000 rpm delivers max hp from the engine and best takoff and climb performance. I flew the patch for an hour varying the rpm between 4200 and 4800 as I attempt to break in the engine. Oil temps are a little higher than normal (as compared to my old engine) running around 200 to 220 deg.C. That should improve as the engine breaks in. The aircraft flight characteristics have really changed with the repositioning of the engine angle. The prop was previously not perpendicular to the longitudial axis of the aircraft with the old motor mounts. Their softness has allowed the engine to droop down 3 degrees. New motor mounts have eliminated the droop and now thrust is in line with the aircraft. I cruise an easy 10 mph faster and landings are easier with a lower angle of attack. Less of a drag and drop effect which I was quite used to.

I still have a number of clean up items to do following the engine upgrade. Most are in the cabin to complete wiring of the various warning lamps for alternator, low oil pressure switch and SDS computer trouble. I’ll wrap those up as time permits. I also want to use the 701 as a test bed for my RV9A engine monitor which I have designed and programmed. There are a number of GPS based screens for backup navigation and position reporting that are best tested in a flying aircraft. More on that as this year progresses.

Skyjeep Second Flight update

The pitch on the prop was decreased from 17 to 15 degrees. Static rpm increased from 4250 to 4750 rpm and climbout was at 1000 fpm. Cruise at 4250 rpm was right around 80 mph. This was a 10 mph increase in cruise speed! The new engine is smooth except at 1000 and below rpm. I will advance the timing at idle speed to 12 degrees and see how that feels. I’ll drop one more degree off the prop and see if I hit that 5000 rpm static I am shooting for. The weather out here has been really socked in for the last week, hopefully this trend will change soon.

Weather is still not co-operating. Hopefully upcoming weekend will be flying weather.

First Flight CH701 new engine

The weather and work schedule finally co-operated and opened a window to get the 701 into the air. I had set the pitch to 17 degrees in anticipation of the extra hp, hoping this guesstimate would keep me from over-reving the engine. It was a bit of an agressive setting as static rpm only hit 4250 as I lifted off. It wasn’t the usually 701 snap off the ground and wildchild takeoff I’m use to, more like a 172 liftoff and climbout. The climbout was pretty decent at this rpm, around 700 fpm indicated, which was about what I would see with the old engine at 5000 rpm at 20 degree C air temp. This rpm setting was my old cruise rpm at 75 mph, now I’m climbing out at a nice rate. First good indication of what this engine was capable of doing. I leveled out at circuit altitude and reduced power to find the same cruise speed of 75 mph was at 3500 rpm. All the engine parameters were looking good and I played with the mixture adjust and watched the A/F ratio indication. There was a pretty strong xwind blowing right across the runway and a system coming in so I decided to get back on the ground and have a look under the hood to see if any new leaks or problems had appeared. Nothing to report.

That was the first flight, a few things to do before the next one such as set the ptich for 15 degrees and see where the static rpm ends up. I have to check my coolant temperature measurements as I am getting a large difference between the sds water temp and my panel gauge coolant temp. Both probes are an inch apart on the swirl pot so there shouldn’t be such a difference in measured temp. I need to get a proper tachometer installed rather than relying on the sds indication. It only changes in 250 rpm steps which is a wee bit corse for my liking. It looks like the weather will not co-operate for the next week or so for flying so I’l be able to get these items attended to.

Skyjeep engine upgrade finally complete

It seemed to take forever to wrap this engine upgrade up but its done now. The first start was amazing, fuel pump on, ecu power on, hit the starter and it burst to life in a few seconds. I quickly checked the BTDC notch with a timing light to confrm the 10 degrees I had set in the ecu was the real value it was reading and then got into playing with the mixture knob to get a smooth idle. Adjustment of the PSRU belt tracking followed and then verification of guages as it warmed up. The Air to Fuel ratio was not reading properly so I ignored it and played with the mixture adjust at a few power settings.

A bit more investigation on the A/F probe indicated that the standard unit I had installed had an effective range of 13.5 to 15. That range is of little use when tuning for power as I target for 12.5 A/F for max hp. A quick chat with Ross from SDS put me on the right track and I ordered a PLX wideband AF meter. This unit provides a range of 10 to 20 A/F readings with .1 A/F ratio accuracy. The sensor module has two analog outputs, 1 goes to the SDS controller and the other to an organic display module. Once installed I had a perfect indication of A/F ratio thruout the entire RPM range I use. One of the ECU contol parameters adjusted is the Fuel Number. This number is entered for every 250 rpm step from 500 rpm to 7000 rpm. You play with this number and fuel mixture adjust knob until you get a A/F ratio of 12.5 or so and a knob set at 12 oclock position which indicates zero mixture bias. Doing this task for the engine rpm range takes 30 minutes with the aircraft tied to a truck, prop on and engine under load. Its of no value to do this with the prop off.

This is a very quick summary of ECU setup, but she’s done and waiting for a chance to go flying and prove out the new engine. I also added 3 more degrees of pitch to the prop in anticipation of all the extra HP I will have available now.

These pictures were taken before final cleanup was done. I’ll try and update these next time I am at the airport. I redid the copper sensing line for coolant pressure and ran it in the wire loom that goes back to the firewall.

Skyjeep upgrade motor mounts

The original Reductions redrive motor mount bushings were due for a replacement. (they are shown in the bottom right corner of the photo)Easier said than solved as the bushings were custom units that could not be replaced. I opted to rework the metal hardpoints and use new isolator bushings from Barry Isolators. The units I selected had slightly different diameters but the same face to face measurements as the old ones which allowed the engine to sit in exactly the same position. I selected isolators that will support the load in all axis with a safety factor of 100%. The bushing are fail safe when you use the proper large diameter washers that Barry Isolators supplies. I used the 44001-13 isolators for this application.

I also had to enlarge the lightening holes on the top hard points to make room for the new fuel injectors and their electrical connectors. This took several file and test fit sessions to get a good fit with minimal metal removal.

Mar 2014 UPDATE: I have found that the 44001-13 isolators to be too soft in both the axial and radial loading conditions. After a few months the lower bushings which are under compression were squishing down way too much. My first flight this year was very interesting as the engine was moving to the right by a few degrees under load and hands off flight was not possible. Once power was reduced on final, the effects of this increased off set went away allowing a controlled final and landing.

I have ordered 4 new 22001-15 bushings from Black Diamond Industries. They have a 300# axial and 60# radial load capacity and the deflection VS load rating is 2.5 times better than the 44001-13.

I also ordered 4 22002-15 isolators which I may use for the bottom mounting points if the 22001-15 are still too squishy.