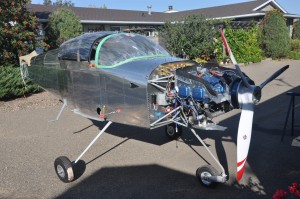
Wind screen trim and rear canopy skirt completion

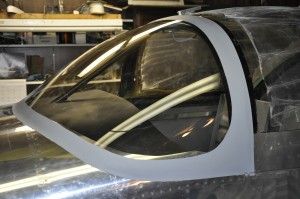
It seemed that the filling and sand cycle would never end, but all good things must come to an end and so did this task. A few coats of high fill sandable primer and touchup with bondo scratch filler and I was finished with this piece. I know there will be another final touchup session before final paint goes on, but this is it for now.
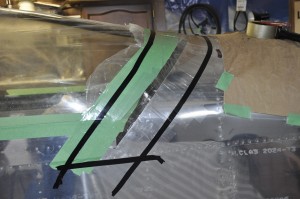
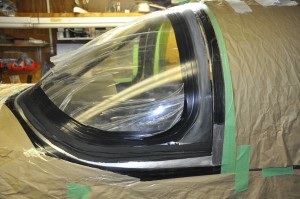
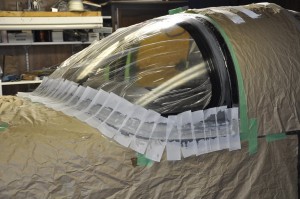
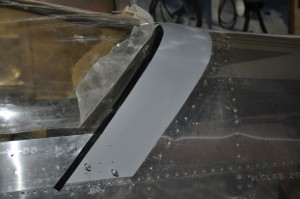
The rear skirt took an equal amount of effort to get to this stage of completion. I have yet to Sikaflex it into place (the black tape is the forward edge of the glue line) and flush rivet where it is attached to the canopy skirt. The fit between canopy and fuselage skin is great. Thanks to Bret Smith for his great building blog http://www.flightinnovations.com/ and ideas for completing the canopy attachment sequence.

Canopy rear cover strip

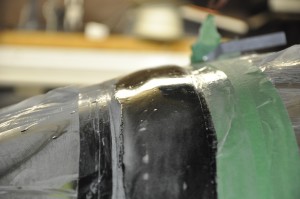
A number of folks are going away from using the kit supplied aluminum rear cover strips to fibreglass layups instead. This method complements the use of sikaflex for canopy-frame attachment as once the cove strip is finished, its glued in place with sikaflex, eliminating the rivets and hole drilling in canopy and frame. The construction process is the same as that used for the windscreen fairing, the strips are 6.5 to 7 inch wide and the initial layup of 6 glass layers is easily done in a hour and a couple of batches of resin. Before starting layup, mylar packing tape is used to cover the gap between the canopy and the rear fuselage skin.

The layup is complete and this weekend I will start sanding and filling it before removing from the aircraft. This method is sand and fill tedious but rather easy and stress free compared to the difficulties I have heard of using a metal skin.

Windscreen fiberglass work continues

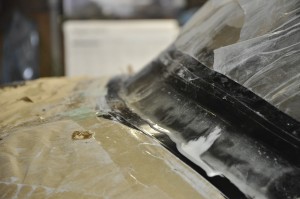
The windscreen had been attached to the roll bar and forward fuselage skin using sikaflex 295 previously. I scuffed up all the surfaces that would be covered with fiberglass and waxed the canopy forward 2 inches with mold release wax before closing it tight. I first did a 7 layer layup starting with a 1/2″ wide then increasing in 1/4″ increments to a width of 2 inches. Once that layup was done I covered it with peel and ply cloth (dacron material) and rolled it with my fibreglass roller to saturate the cloth with excess resin and work out any remaining bubbles or voids. Once the resin cured I removed the peel and ply strips and went to work sanding and sanding. I sand right down to the thickness of the electrical tape which defines the edges of the fibreglass fairing. This works really well for producing a thin straight finished edge where the fairing intersects fuselage and windscreen.

I repeated the process for the rollbar fairing, except the width of the layups varied. First a 2 inch wide strip, then decreasing widths to 1 inch wide and a final 2 inch strip again to smooth it out. Once cured I cut the trailing edge of the fairing to allow a 1 inch overhang on the canopy. Sure was glad I put mold release wax and mylar packing tape on the canopy before doing the layup. It took a bit of work to make the canopy release the grip the layup had on it. I eventually used a feeler guage to get between the two to get a release going.

Wind screen attached

The work on the RV took priority #2 so I could finish the motor replacement in the CH701. We still managed to get the forward cabin skin riveted in place (god that was a tough bucking job for my riveting partner) and I moved onto final trim and fitting of the windscreen. That task is best done with the goal that after several sessions of small trims and fit up you will have it perfect. One would surely screw it up if you attempted to do it in one or two cut. I ordered more SIKAFLEX 295UV and once it arrived I scuffed, cleaned and primed the surfaces that would be glued together. After that was done, I followed the same procedure, more or less, as I used for the canopy attachment, with spacer strips to hold the windscreen off the frame by 1/8″ or so. Filled the gap with SIKAFLEX and then smoothed bead with my rubber finger. It seems to work better than a tounge depressor at giving a nice smooth fill of sikaflex.

This part of the canopy assembly is done now and its on to fiberglass tasks on the aircraft. So far the SIKAFLEX process has been a good experience, a lot less stressful than drilling holes in everything and fretting about cracks. I like the way it looks as a finished product from the exterior, no rivet heads, just a nice black line at contact points.

Sika Flex holds it all together

For a variety of reasons, I have decided to stray from the standard Vans method of attaching the canopy and windscreen to their respective frames. I know its a time tested procedure and there are thousands of RVs flying that have been built this way. I also know that the extreme temperature swings we see up here in Canada will test the limit of the polycarbonate and steel tube frame bond when a rivet is used. The polycarbonate will be the one who gives and resulting stress cracks will inevitably appear. It happened on my CH701 and it will happen on the RV9A.

Vans chose to drill and then rivet the canopy to the frame and side skirts. I have decided to glue the canopy to the frame using a modern adhesive system based upon the product called Sikaflex 295UV. This product is used extensively in the marine industry for attaching windows to frames in a wide range of boats, ships etc. The product is UV stabilized and available in either white or black color. The tubes of Sikaflex 295UV can be purchased from a variety of marine retail outlets. It is time limited (best before) so most dealers don’t keep it on the shelf and have to order it in for you. The most expensive part of this process is the primer product and cleaner product that must be used to prepare the parts to be joined.

I am not breaking new ground using Sikaflex, many others have taken this path. I relied on a number of other builder’s web sites to get the process straight in my mind. A good place to look is Bret’s RV9A builders log under the canopy posts. I checked back with Bret in January of 2012 to see how the Sikaflex was holding up and he reported that it was as good as new after 3 years and a couple hunderd hours of flight. I have heard of a few problems during the preparation phase of this task with cleaner getting somewhere it was not supposed to be and fogging the surface of the canopy. This would be remedied by taking care during the application of the prep solutions and protecting the surfaces where you don’t want it to go.

UPDATE

The summer has passed and I have failed at keeping my building log current. Too much to do on the ranch this time of the year plus a new engine upgrade in the CH701 made for little log update time.

I did manage to finish attaching the canopy to the frame with Sikaflex and completed the attachment of the canopy skirt and canopy latch system. The canopy turned out great, slides freely in the tracks and locks nicely in place. The rear canopy locking pins are a bit tight in the delron blocks but that will loosen over time so no worries there. I must now make sure I have completed every task I can think of forward of the instrument panel so the forward cabin skin can be riveted in place. Once in place, any work forward of the instrument panel becomes an upside down task, not particularly fun.

I’ll post a picture of the finished canopy work shortly.