The new fuel injected EA81 required a number of changes to the fuel and electrical systems of the CH701. The old engine had a carb and a pair of low pressure facet style pumps to deliver the fuel to the carb. The new engine requires a pair of high pressure fuel pumps, a pair of 10 mircon filters down stream of the pumps and a fuel return line to the header tank from the fuel rail pressure regulator.
I was advised to use the Walbro HP fuel pumps. These pumps are recommended for reliability and ability to pull fuel better than Bosch pumps. Fitting one gascolator, two fuel pumps, two filters and all the required fitting needed to facilitate maintenance of these items makes for a real head scratching installation. It took three four hour sessions out at the hanger to get it the way I wanted. I haven’t had to maintain it yet, so filter pulling will be the ultimate test.
 The return fuel line uses a fire sleeved fuel hose, steel bulkhead fitting and 1/4″ steel tubing for the loop back to the header tank. This is a low pressure loop which dumps excess fuel back into the header tank as the fuel rail regulator does its thing to keep the rail at 36 psig.
I used a firesleeved stainless steel braided fuel line between the fuel pump system on the firewall and the fuel rail inlet. This was a surplus hose that came with my RV9A firewall forward kit.
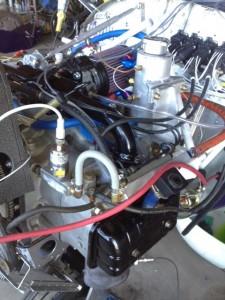
I added a fuel pressure transducer on the fuel rail and a digital gauge in the instrument panel for monitoring fuel pressure. This transducer is ranged for a 0-100 psi and puts out a 4-20 ma signal which is displayed on a digital display.
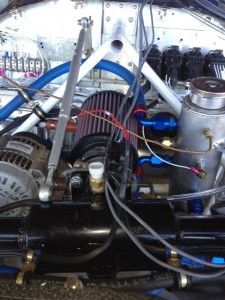
 The photo on the left shows the new intake manifold, throttle body and filter assembly. To the right of the air filter is the new swirl pot for the coolant system. This pot collects the hot water from the two head outlets and directs it to the cabin heater and eventually back into the water pump or when water temp reaches 180 deg.f the thermostat in the bottom of the swirl pot opens and send the hot coolant off to the belly mounted radiator. The copper sensing line on the pot will be removed and reworked prior to signing off the upgrade in the log book.