Nothing particularly noteworthy, just lots of holes to drill in the hinge areas of the upper and lower cowl split lines. Once completed, I removed al the hinges and drilled 3/16″ holes in between every rivet hole. This hole will allow the epoxy to make a better bond between the fiberglass cowl and the aluminum hinge.
Uploaded picture of primary electrical system
Heres a single line diagram of my primary power distribution
Fitting the upper and lower cowl
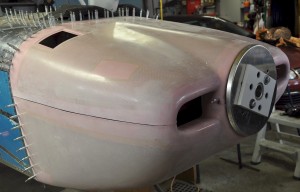 The weekend was consumed by cowl fitting activities. First the upper cowl is fit using the spinner back plate as the reference point. The upper cowl must sit 1/4″ behind the spinner and 1/8″ below the top of the spiner to allow for motor sag as the motor mount cushions break in. Once centered the aft edge of the cowl is marked for cutting using reference lines previous placed on the fuselage. The cowl is removed and trimmed (slightly oversize). Once the fit of the cowl is good, a nice even space of ~1/16″, the holes for the rivets are drilled thru the cowl using the predrilled holes in the firewall attach hinges as guides. A strong light behind the hinge lets the holes appear thru the cowl skin.
Fit up of the bottom cowl is a bit more work but more of the same type of procedure. 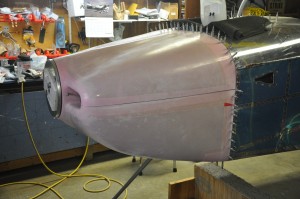 First the bottom section is taped to the fuselage and the front section is aligned with the upper cowl which is fastened in place. The bottom of the cowl is marked, trimmed, drilled and clecoed in place. Next the sides are marked and trimmed with the fuselage sides. There is a lot of sanding cutting and filing involved in the process with pices coming on and off multiple times until fit is good.
Finally the sides of the upper and lower cowl are trimmed and sanded to fit. The top edge of the bottom cowl section is supposed to be straight and true and used as the reference line. It was for the most part. The lower edge of the upper cowl is then marked and trimmed. Again, simply stated but a lot of on and off agin of the cowl is required to trim and sand to the desired fit.
By the end of the weekend the cowl was clecoed to the fuselage, alignment is good and gaps along the hinges are pretty consistant. This week I’ll get the hinges installed on the sides of the cowl, joining the upper and lower halves.
Engine components arrive
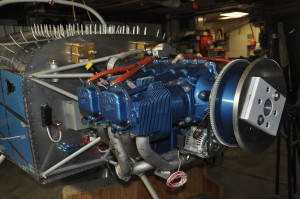 Aerosport completed the fabrication of the fuel injection hoses to the lengths I provided them with. It was a relief to see that my measurements were good and all the hoses fit. They also fabricated two long 30″ hoses for the MAP sensors in the ECU boxes. They added fire sleeve to these, which may be over kill but not necessarily something I wil worry about.
I also received the “deluxe” prop extension, Spinner kit and the Vetterman exhaust from Vans on the same day. It was like Christmas in the shop. The fit on the Sabre prop extension is very accurate. It took some work to make the rear plate for the spinner to fit as the bolt holes are drilled for 3/8″ and my prop bolts are 1/2″.
I’m preparing for top cowling fit up this weekend. All the prework is done now.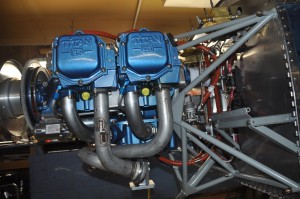
Building gets back into full swing
 October and November have been productive months for the project. Fall chores are pretty well wrapped up and I can hide in the shop with little guilt about things that should be done.
The wings are closed up now. I had left them open for the pre-close inspection by the MDRA (Ministers Delegate for Recreational Aviation). That was completed last January but once I got into the fuselage work again, the wings took the back burner.
Dynon Roll servo installed, wiring conduits for tip lights installed, mast for AOA probe installed, last of the bolts for the fuel tank installed and torqued up. All of the above and the riviting of the bottom skins took 2 weeks to complete. Wings back onto the rolling and stand and moved into storage until attachment time.
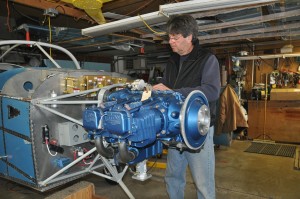
The engine installation was surprisingly easy to do. Research on the task indicated a need to assemble an army of friends to assist and a fridge full of refrshments to reward after the task was completed. I hooked the engine on the floor hoist at 3:30 PM and was complete by 4:20 PM. That was easy!