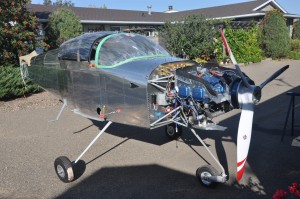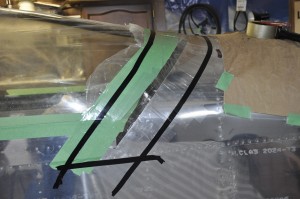
Canopy rear cover strip

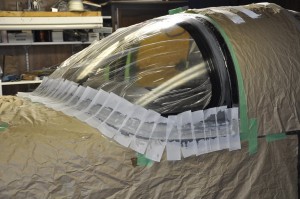
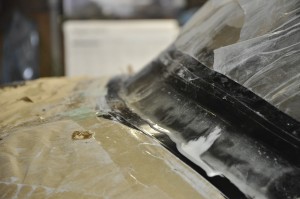
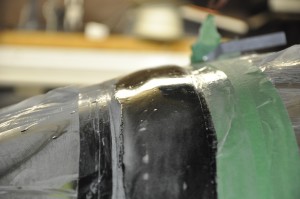
A number of folks are going away from using the kit supplied aluminum rear cover strips to fibreglass layups instead. This method complements the use of sikaflex for canopy-frame attachment as once the cove strip is finished, its glued in place with sikaflex, eliminating the rivets and hole drilling in canopy and frame. The construction process is the same as that used for the windscreen fairing, the strips are 6.5 to 7 inch wide and the initial layup of 6 glass layers is easily done in a hour and a couple of batches of resin. Before starting layup, mylar packing tape is used to cover the gap between the canopy and the rear fuselage skin.

The layup is complete and this weekend I will start sanding and filling it before removing from the aircraft. This method is sand and fill tedious but rather easy and stress free compared to the difficulties I have heard of using a metal skin.
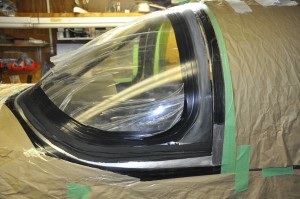
Windscreen fiberglass work continues

The windscreen had been attached to the roll bar and forward fuselage skin using sikaflex 295 previously. I scuffed up all the surfaces that would be covered with fiberglass and waxed the canopy forward 2 inches with mold release wax before closing it tight. I first did a 7 layer layup starting with a 1/2″ wide then increasing in 1/4″ increments to a width of 2 inches. Once that layup was done I covered it with peel and ply cloth (dacron material) and rolled it with my fibreglass roller to saturate the cloth with excess resin and work out any remaining bubbles or voids. Once the resin cured I removed the peel and ply strips and went to work sanding and sanding. I sand right down to the thickness of the electrical tape which defines the edges of the fibreglass fairing. This works really well for producing a thin straight finished edge where the fairing intersects fuselage and windscreen.

I repeated the process for the rollbar fairing, except the width of the layups varied. First a 2 inch wide strip, then decreasing widths to 1 inch wide and a final 2 inch strip again to smooth it out. Once cured I cut the trailing edge of the fairing to allow a 1 inch overhang on the canopy. Sure was glad I put mold release wax and mylar packing tape on the canopy before doing the layup. It took a bit of work to make the canopy release the grip the layup had on it. I eventually used a feeler guage to get between the two to get a release going.

Skyjeep Second Flight update

The pitch on the prop was decreased from 17 to 15 degrees. Static rpm increased from 4250 to 4750 rpm and climbout was at 1000 fpm. Cruise at 4250 rpm was right around 80 mph. This was a 10 mph increase in cruise speed! The new engine is smooth except at 1000 and below rpm. I will advance the timing at idle speed to 12 degrees and see how that feels. I’ll drop one more degree off the prop and see if I hit that 5000 rpm static I am shooting for. The weather out here has been really socked in for the last week, hopefully this trend will change soon.

Weather is still not co-operating. Hopefully upcoming weekend will be flying weather.

First Flight CH701 new engine

The weather and work schedule finally co-operated and opened a window to get the 701 into the air. I had set the pitch to 17 degrees in anticipation of the extra hp, hoping this guesstimate would keep me from over-reving the engine. It was a bit of an agressive setting as static rpm only hit 4250 as I lifted off. It wasn’t the usually 701 snap off the ground and wildchild takeoff I’m use to, more like a 172 liftoff and climbout. The climbout was pretty decent at this rpm, around 700 fpm indicated, which was about what I would see with the old engine at 5000 rpm at 20 degree C air temp. This rpm setting was my old cruise rpm at 75 mph, now I’m climbing out at a nice rate. First good indication of what this engine was capable of doing. I leveled out at circuit altitude and reduced power to find the same cruise speed of 75 mph was at 3500 rpm. All the engine parameters were looking good and I played with the mixture adjust and watched the A/F ratio indication. There was a pretty strong xwind blowing right across the runway and a system coming in so I decided to get back on the ground and have a look under the hood to see if any new leaks or problems had appeared. Nothing to report.

That was the first flight, a few things to do before the next one such as set the ptich for 15 degrees and see where the static rpm ends up. I have to check my coolant temperature measurements as I am getting a large difference between the sds water temp and my panel gauge coolant temp. Both probes are an inch apart on the swirl pot so there shouldn’t be such a difference in measured temp. I need to get a proper tachometer installed rather than relying on the sds indication. It only changes in 250 rpm steps which is a wee bit corse for my liking. It looks like the weather will not co-operate for the next week or so for flying so I’l be able to get these items attended to.

Wind screen attached

The work on the RV took priority #2 so I could finish the motor replacement in the CH701. We still managed to get the forward cabin skin riveted in place (god that was a tough bucking job for my riveting partner) and I moved onto final trim and fitting of the windscreen. That task is best done with the goal that after several sessions of small trims and fit up you will have it perfect. One would surely screw it up if you attempted to do it in one or two cut. I ordered more SIKAFLEX 295UV and once it arrived I scuffed, cleaned and primed the surfaces that would be glued together. After that was done, I followed the same procedure, more or less, as I used for the canopy attachment, with spacer strips to hold the windscreen off the frame by 1/8″ or so. Filled the gap with SIKAFLEX and then smoothed bead with my rubber finger. It seems to work better than a tounge depressor at giving a nice smooth fill of sikaflex.

This part of the canopy assembly is done now and its on to fiberglass tasks on the aircraft. So far the SIKAFLEX process has been a good experience, a lot less stressful than drilling holes in everything and fretting about cracks. I like the way it looks as a finished product from the exterior, no rivet heads, just a nice black line at contact points.