Fuel Tank Weeper

tank_off1 tankoff2tank_leak1 tankleak2I guess the pictures tell the story. The weeping rivet on the backside of the tank showed up after the first tank fill. I had pressure tested the tank, but it happens. I’ll get this fixed this week and hopefully back on by the weekend. Removing the tank took about 1.5 hours. I expect replacing to take twice as long. Tonight I’ll get the tank pressured up and dunk it a water tank. That should allow me to pinpoint the problem and develop a plan of attack.


Last night I pressured up the tank and found the leak using leak detecting liquid (Snoop). In the pictures it looks like a rivet leak but it is actually right between two rivets. I checked the rest of the tank and could find no evidence of any other leaks with the snoop. I left the tank pressurized over night and this morning the ballon was just as inflated as I left it 12 hours ago. This is a pretty tiny leak but pesty enough to fix.

I plan to pull a vacuum on the tank and then use Loctite 290 to flow into the void. Loctite 290 is a wicking thread sealant that stands up to leaded petro. I have read of others on the Vans Airforce forum who have successfully fixed weepers using this technique. If this doesn’t work, plan B will be more agressive, cutting into the tank and sealing with pro-seal from the inside, then patching the cut out. Hope I don’t have to go that way.

Stettler Labour Day Fly In Pancake Breakfast

Our annual September Labour day pancake fly-in is coming up this weekend. My RV hanger gets used as the main feeding area and cook house. My CH701 hanger gets used by the model aircraft club for their static displays. I am having to abandon Tango Lima Lima for the next week as I clean up my mess and make the place ready for our guests. We typically have 80 to 100 aircraft fly in and serve over 600 meals in the short period of 3 hours. I’m the flight line director and control the ground movement of the aircraft coming and going. It gets totally hectic for a while as I try and keep the bottle necks un-plugged. We love it and so do all our guests.

Post Breakfast Update:

It was a fantastic day. The weather was great, winds were almost calm, slightly favouring runway 25. We had over 80 aircraft fly in to the event and we served in excess of 600 meals. There were no incidents in the circuit, other than some minor crowding between the fast and slow aircraft. We had a dozen RVs attend and it was a chance to meet and talk about our projects. Finally met Troy Branch from Calgary and had a look at his beautiful RV10. Nice work Troy!

Weighing in at 1060 lbs

I completed an initial weighing prior to pulling Tango Lima Lima out. With most of the interior installed (stuck in place temporarily) and oil in the engine, I get an empty weight right around 1060 lbs. From various posts I have read on the Vans Airforce forum, this is a decent weight for an airframe with the heavier engine installed. Other RV9A’s with more bells and whistles installed can easily exceed 1100 lbs. My Catto prop helps keep the weight down. A constant speed prop would definitely push me over the 1100 lb. line. The nose wheel weight is sitting at 284 lbs right now. I have read that 325 lbs is the operating limit weight for a 9A. I’ll have to work at the W&B prior to Final Inspection  but I suspect I’m going to be good “as-is”.

First Engine Run and more

tll_first_run1 Tango Lima Lima, as she is now registered, was pulled from the hanger and towed over to the fuel pump. I added 20 litres of fuel to each tank and then pulled it back to the apron in front of the hanger. I followed the instructions of Precision Airmotive’s Eagle ECU specialist, Dennis Anttilla for starting the engine. For the first time in 4 years, it came to life with just a couple of revolutions of the prop. I ran the engine for a few minutes and then shut it down so I could look for oil leaks or what-ever. Sure enough, I had missed tightening down an oil line fitting on the oil cooler. This was quickly remedied and the mess was cleaned up. I fired her up again and then started taxi testing around the ramp area. It sure sounds sweet! I could idle down to 700 rpm and it was still smooth running. The big IO360 with straight pipes is going to make it’s presence known soon.

Ground handling is a lot easier than my previous experience with Mike Seager’s RV6A on a grass strip. Short radius turns are way easy with the castering nose wheel . I have not installed the engine cowlings so I limited the run time on the engine to ensure it didn’t get too warm. Probably not an issue on a cool evening at low power settings, but I’m being overly cautious. I found a few snags that I need to work thru prior to my Final Inspection by the MD-RA. Most concerning is the small fuel weep on the left tank. This weep is coming from the back side of the fuel tank so I will have to remove the tank to find it and fix it. Groan. I had pressure tested both tanks prior to attaching to the wing but I am told this happens. Not looking forward to that task but better now than in the winter months with frozen fingers on cold tools and fittings. There is also the slight odor of 100LL in the cabin when the boost pump is on. I will have to go over all the fuel line fittings one more time to find the leaker.tll_first_run3

The Eagle Screen is working really well. Up to now, all data received from the Eagle was static and it was difficult to validate all information was being displayed properly. I have a few points that need tweeking but this is normal stuff when you commission a new system. Data is streaming in from the Dynon and being displayed along with GPS data from a separate Garmin puck. It’s all coming together now. I’ll get some screen dumps posted to the blog in a week or so. I really like trend displays and I have set up a number of fast trends and slower historical trends with averaged and normalized values. This is a good way interpret how your engine is working and identify problems in the early stages.

Transition Training wraps up at Vernonia

IMG_0570 (960x1280)

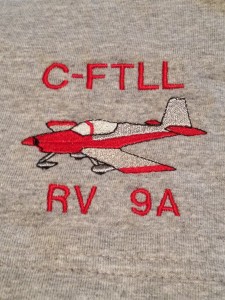
Mike’s wife Georgina makes all the T-Shirts for Vans and also does custom embroidery with her custom Brother embroidery machine. I couldn’t resist getting a custom tee shirt done for me while I was there.

Notice how I said the transition training wraps up at Vernonia? Yes there is a lot more flying to do before I am ready to fly off into the sunset with Tango Lima Lima. Over the last three days I picked up 10 hours of RV flying time, learned a number of new skills and was refreshed on many I had let rust up. I am getting close to managing a proper RVA landing but still haven’t got it yet. To get there I am going to have to fly many more hours (in the 701) and get back into the spot I was in 2007 when I flew a lot more. I did pretty good on the upper air work, take-off weren’t too bad once I quit fisting the stick and held it with my thumb and forefinger. The circuit had its good and bad moments. Mike flies what I first thought was a real tight circuit but it’s really by the book and everyone who was training in 172s at the airport flies long and wide bomber circuits. What was amusing is that as soon as we got in the circuit doing stop and goes, everyone else tightened up their circuits to keep in sync with us. Mike chuckles. So with this RV aircraft, if you don’t hit the numbers (airspeed, rpm, altitude) as effectively as possible, the rest of the circuit gets squished up and you run out of time (get too far out on downwind leg or too far on base leg) All of these situations can get you into a difficult spot.

I think that its easy to get tricked into thinking that this aircraft has very docile and easy to manage flight characteristics for low time pilots. The company literature might make you come to that conclusion “It’s so easy to fly that low time pilots can make a quick and painless transition”. Mike assured me that the RV9A is same aircraft to land, just does it 10 mph slower than the RV6A we were practicing in.

Flying in the coastal hills and mountains has been a real change for this flatland flyer. I was starting to get my bearings by the end of this session and figured out the local features so at least I had a rough idea of where we were most of the time.

IMG_0568 (1280x960)

I finished for the day, Carl gets the 7 ready to go. I was totally soaked as Mike worked me hard in the circuit (plus it was in the mid 80’s, probably 90’s in the cabin)

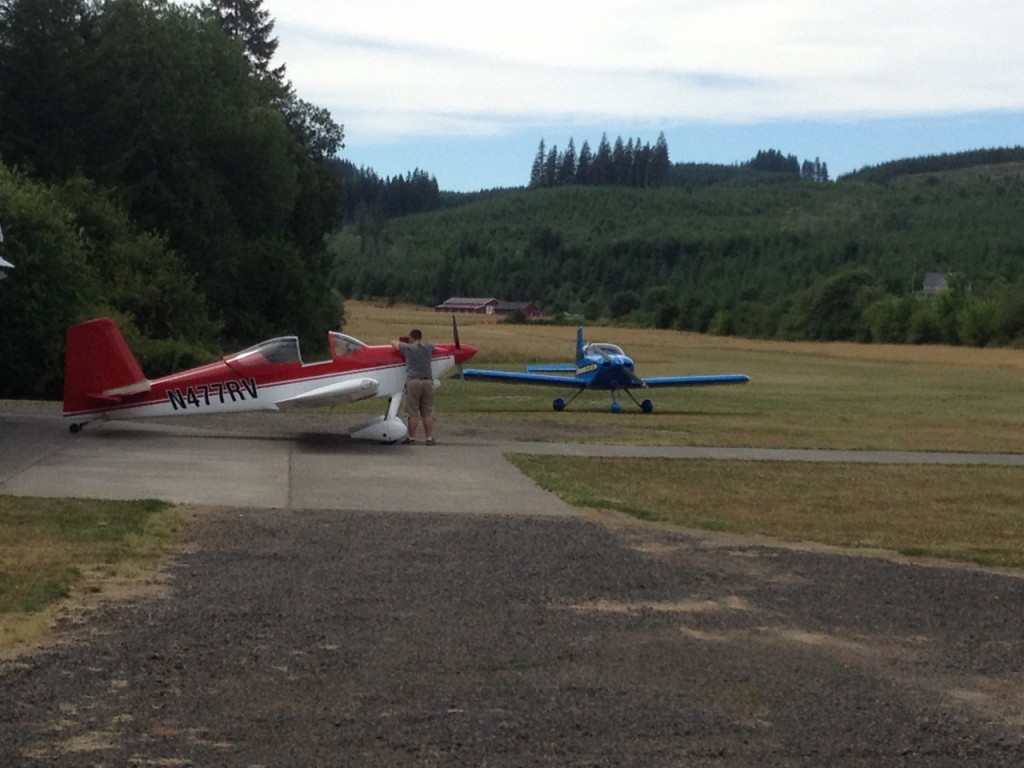
All that confession aside, this morning we met up the Van’s man himself at the fuel stop in Scappoose. Richard (Van) VanGrunsven and another staffer were flying up for the Arlington Airshow and stopped for fuel in the RV10A. It seems the starter pad had worked its way loose over time and the starter was unable to engage the ring gear when they tried to restart after fuel up. It was unfortunate for them but I enjoyed the chance to go over and help them get the lower cowling back on after tightening up starter bolts. Van is such a nice gentleman.

Tomorrow its back to Calgary and then the drive home. Its been a very good experience and will pay off big time.
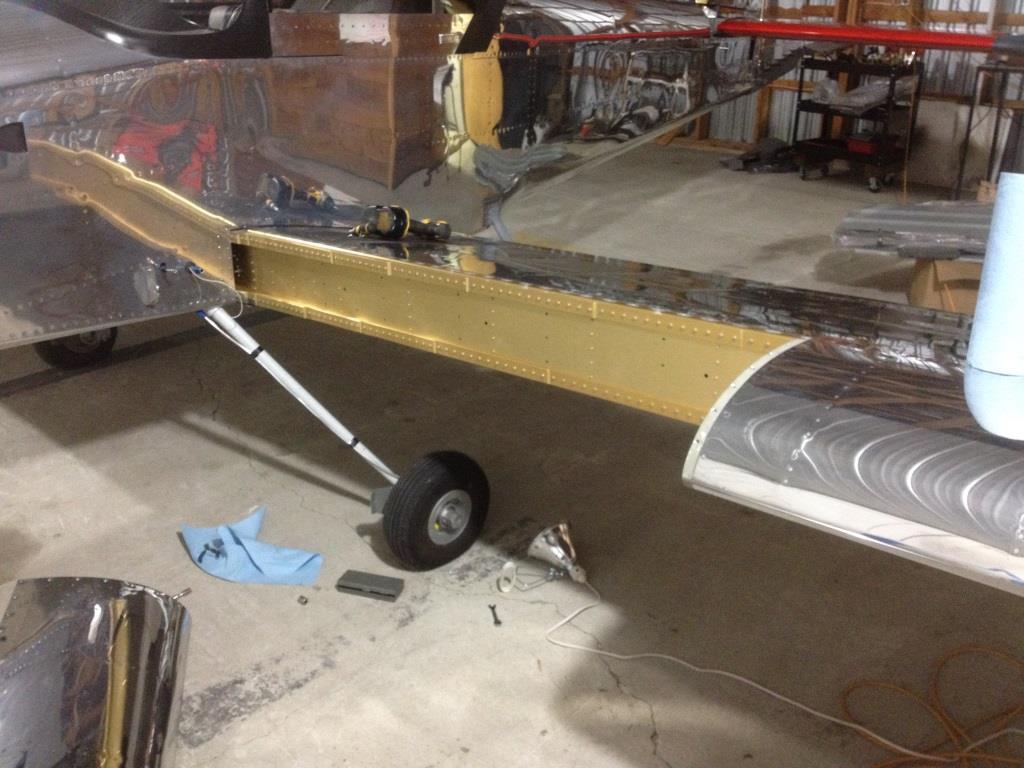
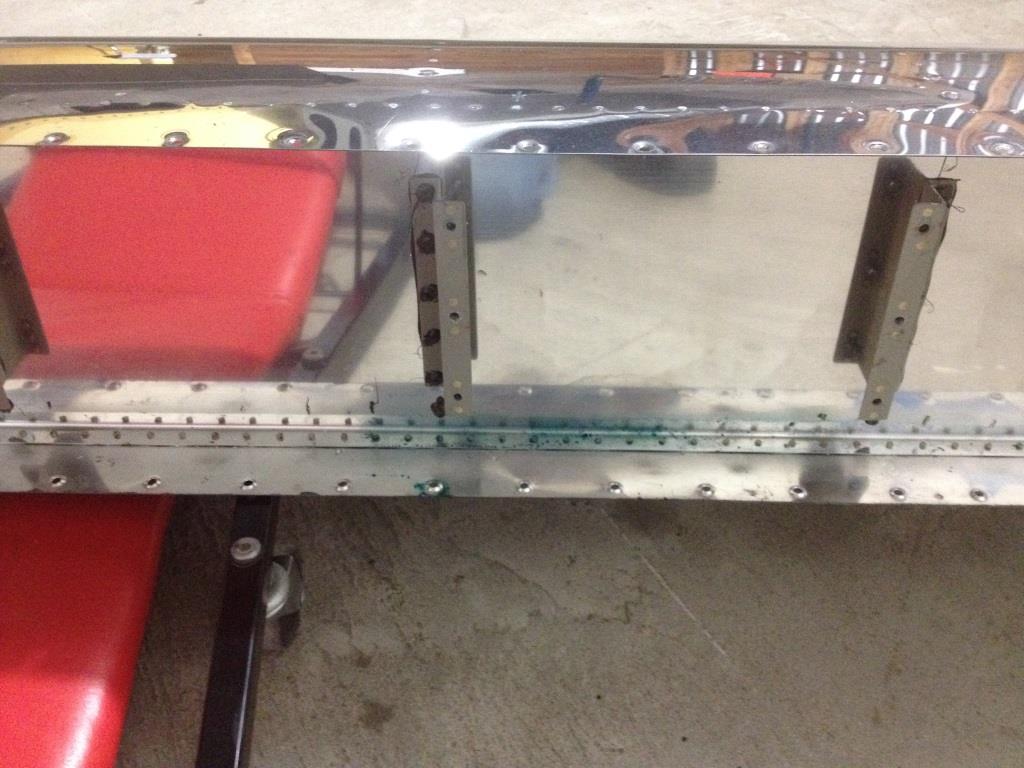
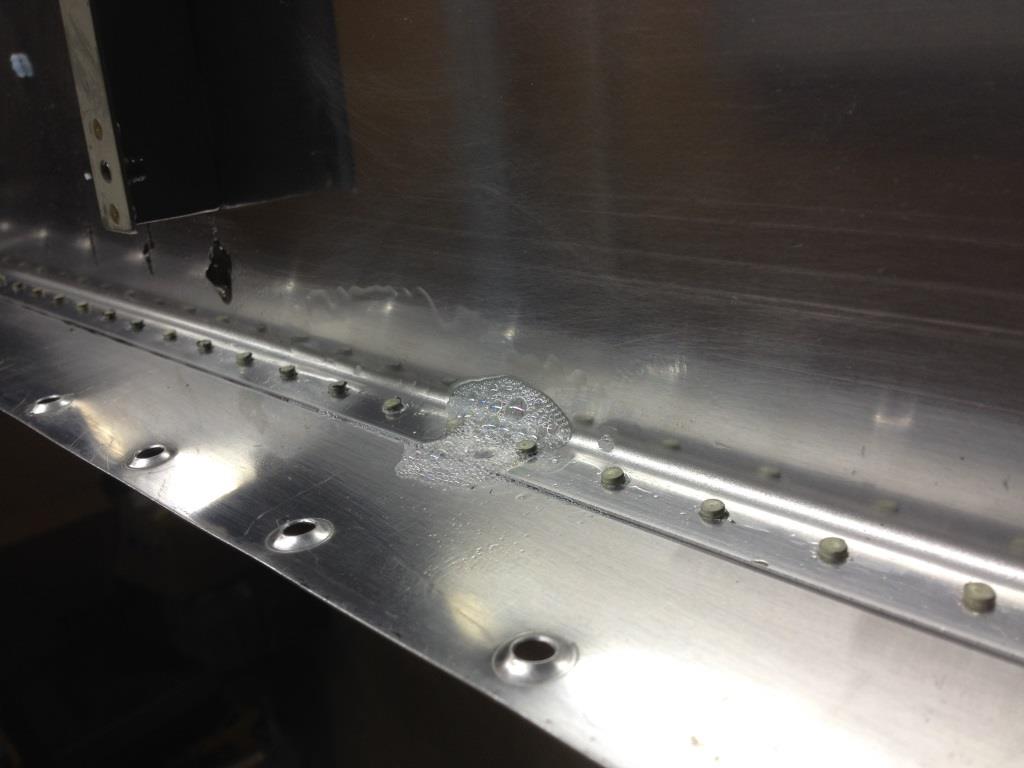
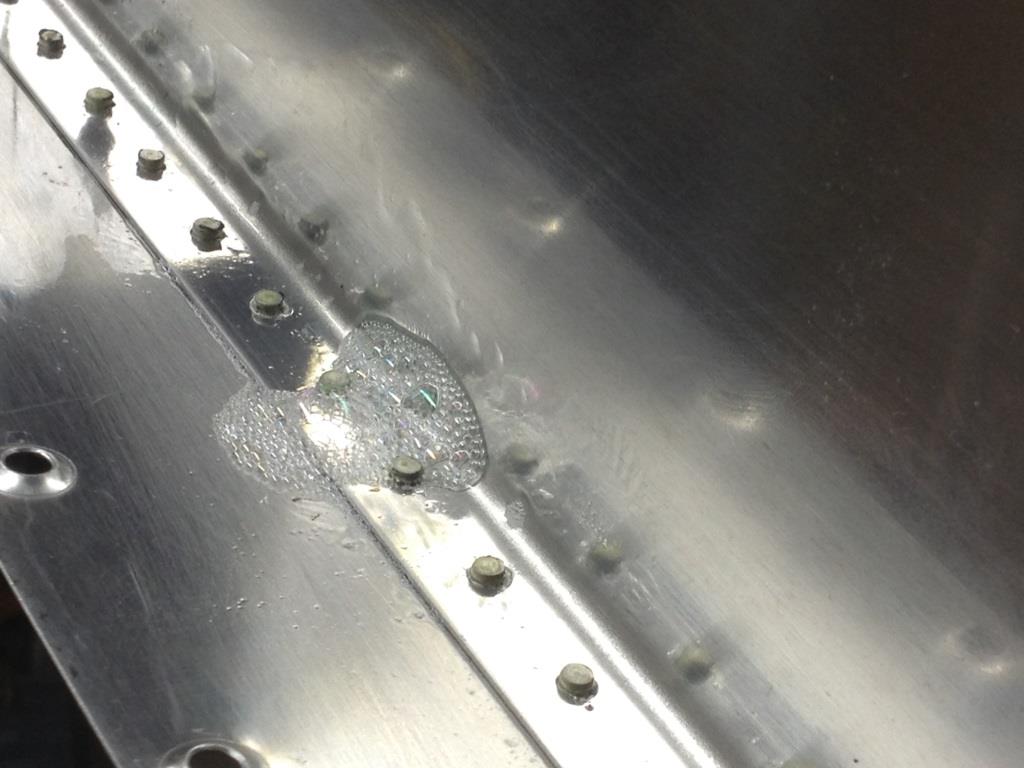