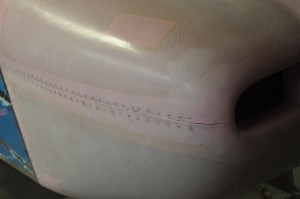
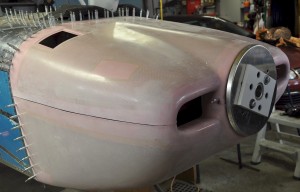
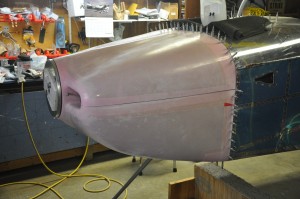
Todays task was the fastening of the cowl hinges to the upper and lower cowl halves. Surfaces were scrubbed and sanded on the cowls and hinges. Epoxy resin was mixed with microspheres to make a slurry. This mixture buttered on the cowl surfaces where the hinges attach. Clecoed in place and then riveted for final attachment with flush rivets. The epoxy mixture oozed out of the holes I had drilled for that purpose. So far all is going according to plan. Tomorrow it will be back to work on the baffles
Category Archives: Cowl
Cowl work continues
Nothing particularly noteworthy, just lots of holes to drill in the hinge areas of the upper and lower cowl split lines. Once completed, I removed al the hinges and drilled 3/16″ holes in between every rivet hole. This hole will allow the epoxy to make a better bond between the fiberglass cowl and the aluminum hinge.
Fitting the upper and lower cowl
 The weekend was consumed by cowl fitting activities. First the upper cowl is fit using the spinner back plate as the reference point. The upper cowl must sit 1/4″ behind the spinner and 1/8″ below the top of the spiner to allow for motor sag as the motor mount cushions break in. Once centered the aft edge of the cowl is marked for cutting using reference lines previous placed on the fuselage. The cowl is removed and trimmed (slightly oversize). Once the fit of the cowl is good, a nice even space of ~1/16″, the holes for the rivets are drilled thru the cowl using the predrilled holes in the firewall attach hinges as guides. A strong light behind the hinge lets the holes appear thru the cowl skin.
Fit up of the bottom cowl is a bit more work but more of the same type of procedure.  First the bottom section is taped to the fuselage and the front section is aligned with the upper cowl which is fastened in place. The bottom of the cowl is marked, trimmed, drilled and clecoed in place. Next the sides are marked and trimmed with the fuselage sides. There is a lot of sanding cutting and filing involved in the process with pices coming on and off multiple times until fit is good.
Finally the sides of the upper and lower cowl are trimmed and sanded to fit. The top edge of the bottom cowl section is supposed to be straight and true and used as the reference line. It was for the most part. The lower edge of the upper cowl is then marked and trimmed. Again, simply stated but a lot of on and off agin of the cowl is required to trim and sand to the desired fit.
By the end of the weekend the cowl was clecoed to the fuselage, alignment is good and gaps along the hinges are pretty consistant. This week I’ll get the hinges installed on the sides of the cowl, joining the upper and lower halves.